
We all love our cars, and we all want to keep it in perfect condition. It is important to recognise that whilst we may have good intentions when cleaning our cars, without suitable cleaning methods we can at times be the source of damage to our pride and joy.
You’ve been cleaning your car all wrong
As we clean our vehicles paint we are removing large quantities of dirt and sediment. This sediment accumulates in the wash pad and settles on the bottom of the suds bucket. Each time we dip our wash pad in the suds bucket we pick up more of the sediment previously removed from vehicle. This sediment is then reintroduced to the paint work on the wash pad. This accumulated sediment acts like sand paper abrading your paint introducing swirl marks, light scratches and marring. Ouch!
Clean your car with the two bucket system
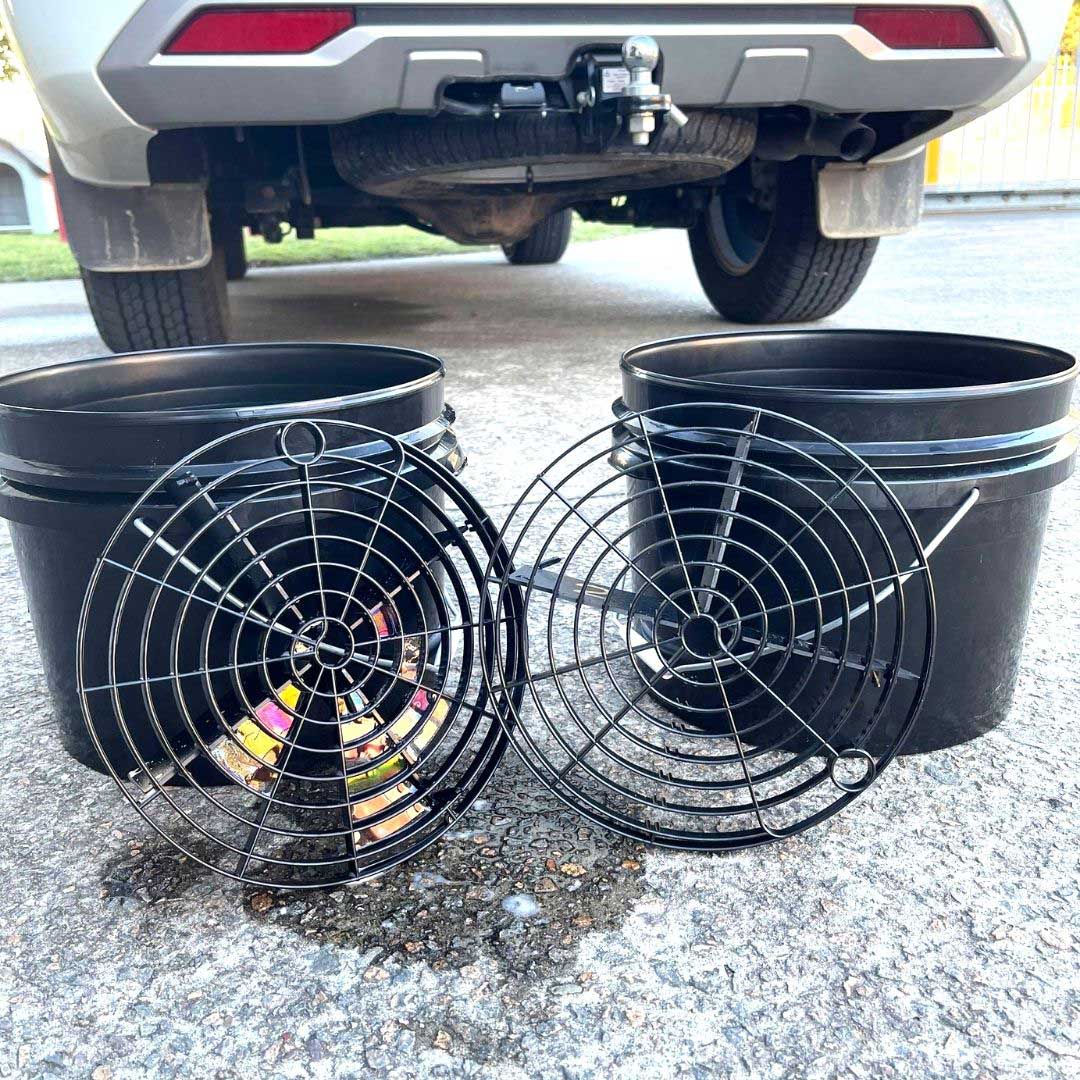
The two-bucket method using a scratch shield is a vehicle washing lifesaver!
This method minimises the risk of fine scratches, swirl marks and marring, due to dirt sediment accumulating in the wash pad. The two bucket-method requires you to place a scratch guard in the bottom of each bucket, one bucket filled with car shampoo and the other is filled with fresh water. This process of removing excess sediment is achieved by simply rubbing the wash pad across the scratch shield to loosen embedded sediment.
Taking a little extra time and care using the two-bucket wash method with grit guards will reduce the amount of sediment suspended in the wash pad, reducing abrasive damage. Keeping your cars paintwork in its best possible condition.
How to: Two Bucket car cleaning method
So to get started, you will just need to drag-n-drop the How-to Schema block in the Gutenberg editor. The How-to Schema block can be used on pages that contain The two bucket system is a simple yet very effective washing method that reduces the risk of transferring the dirt and contaminates back onto the vehicle surface. For this, you will need two wash buckets, as a minimum of two scratch shields and an AutoSmart Car Wash

Required Tools:
– Fresh water – Two buckets – Two scratch shield guards – Car washLet’s get cleaning:
Step 1 – Pre-soak your car
It is recommended that you presoak your vehicle before cleaning. presoaking will loosen and help remove heavy sedimnent before the manual washing process begins. This will also help to minimise abrasive damage.
Step 2 – Fill up your Car shampoo bucket
Step 2 – Fill up your Car shampoo bucket
In the suds bucket add your Autosmart carwash diluting approximately 50ml per 5L. Drop the scratch shield into the bucket so it sits on the bottom.
Step 3 – Fill your Freshwater bucket
Fill the freshwater bucket up to cover half the scratch shield mounted at 45⁰
Step 4 – Clean your car top to bottom
Dip your wash pad into the soapy water wash bucket and begin cleaning your vehicle working from top to bottom. We apply the soap top to bottom because most of the sediment is located on the lower parts of the car. Working from top to bottom prevents you carrying this sediment to the top parts of your vehicle.
Step 5- Rinse your wash pad
Between cleaning sections, it is important to clean the wash pad in the freshwater bucket removing any excess sediment, simply rub the wash pad across the scratch shield in alternating directions rinsing the wash pad repeatedly in the freshwater. Once wash pad is cleaned re-dip in the suds bucket and clean another section of the car.
Scratch Guard tip:
The bucket with fresh water, place your Scratch Shield on a 45-degree angle, this way you can rub the sponge or pad along the Scratch Shield surface to remove dirt and contaminates.
Shop Now